
How To Make Homemade Lotion Bars
- May 1, 2024
- 5 min read
Updated: May 7, 2024
Discover the secret to silky-smooth skin with our easy homemade lotion bar recipe! Packed with all-natural, nourishing ingredients. Say goodbye to dryness and hello to radiant skin.
Homemade lotion bar recipe with all-natural nourishing ingredients. This easy lotion bar recipe works wonders for all, especially those dealing with dry or cracked skin.

Oh, how I love this lotion bar recipe with all-natural, nourishing ingredients. Don't be intimidated by these perfect squares—they're incredibly simple to make. Homemade lotion bars are packed with skin-nourishing nutrients and moisturizing benefits and they are easy to use. Lotion bars glide seamlessly over your skin, requiring just a moment to apply.
In a world filled with endless skincare options, there's something uniquely satisfying about creating your own nourishing products at home. Lotion bars, in particular, offer a luxurious way to moisturize and pamper your skin without the hassle of liquid lotions.
Making homemade lotion bars allows you to tailor wholesome ingredients to suit your needs. ensuring a natural and nourishing experience. Knowing exactly what goes into each lotion bar gives you peace of mind, as you can avoid harmful chemicals and preservatives commonly found in store-bought alternatives. Plus, there's a sense of satisfaction and pride in creating something beneficial for your skin from scratch, making each application a small act of self-care and indulgence.

What ingredients do I need to make homemade lotion bars? Click the highlighted text to shop.
Beeswax pellets or grated beeswax
Cocoa butter or shea butter
Essential oils (optional) for fragrance
Vitamin E oil (optional) for extra Nourishment

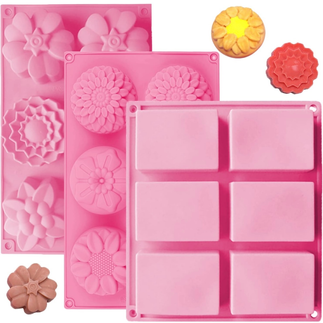
You'll need an affordable silicone soap mold to make these lotion bars, which you can easily find in a three-pack on Amazon for approximately $10. Click the highlighted text to shop. These molds are versatile and can be utilized for various projects, including this lotion bar recipe and our shower steamer recipe. Keep them handy, as Lia Rose Simply Home will soon feature a guide on creating soap jellies. Don't miss out on our entertaining and simple soap jelly recipe—it's bound to bring plenty of wiggly, jiggly fun!
What are the benefits of cocoa butter for your skin?
Cocoa butter offers numerous benefits for the skin, including:
1. Deep Hydration: Cocoa butter is highly moisturizing, penetrating deep into the skin to nourish and hydrate dry skin.
2. Skin Softening: Regular use of cocoa butter can help soften rough and dry areas of the skin, leaving it feeling smooth and supple.
3. Improved Elasticity: Cocoa butter contains natural antioxidants that promote skin elasticity, helping to reduce the appearance of stretch marks and improve skin firmness.
4. Soothing Properties: Cocoa butter has soothing properties that can help alleviate irritation and inflammation, making it suitable for sensitive or irritated skin.
5. Scar Reduction: With regular application, cocoa butter may help reduce the appearance of scars and blemishes, promoting a more even skin tone.
6. Protection Against Environmental Damage: Its rich emollient properties create a protective barrier on the skin, guarding against moisture loss and environmental damage.
7. Anti-Aging Benefits: Cocoa butter's antioxidant properties help combat free radicals, which can contribute to premature aging, helping keep the skin youthful and radiant. Overall, cocoa butter is a versatile skincare ingredient that can benefit all skin types, providing hydration, nourishment, and protection for healthier-looking skin.
What are the benefits of coconut oil for your skin?
Coconut oil offers several benefits for your skin, including:
1. Moisturization: Coconut oil is rich in fatty acids that deeply moisturize the skin, helping to hydrate and soften dry or flaky areas.
2. Skin Barrier Protection: Coconut oil's emollient properties create a protective barrier on the skin, preventing moisture loss and maintaining hydration levels.
3. Antimicrobial Properties: Coconut oil contains lauric acid, which has antimicrobial properties that can help protect the skin against bacteria, viruses, and fungi, reducing the risk of infections.
4. Anti-inflammatory Effects: Coconut oil has anti-inflammatory properties that can help soothe and calm irritated or inflamed skin, making it beneficial for conditions like eczema and psoriasis.
5. Skin Healing: Coconut oil may promote faster wound healing and reduce the appearance of scars due to its ability to stimulate collagen production and improve skin elasticity.
6. Anti-Aging Benefits: The antioxidants present in coconut oil help combat free radicals, which can contribute to premature aging, helping to minimize the appearance of fine lines and wrinkles. Overall, coconut oil is a versatile skincare ingredient that can benefit various skin types, providing hydration, protection, and soothing relief for healthier-looking skin.
Important Tips
Before pouring the lotion bar mixture, place the soap molds on a cookie tray. While silicone molds are great, they can be flimsy, especially if you plan to chill your lotion bars in the fridge for quicker hardening. Placing them on a cookie sheet not only provides support but also prevents any spills. Click the highlighted text to shop soap molds.


For this lotion bar recipe, you'll need solid coconut oil, not fractionated (liquid) coconut oil. The solid coconut oil will melt when heated but returns to a solid state as the bars cool, unlike fractionated oil, which remains liquid. This solid coconut oil is essential for giving the bar structure and solidity.
Fractionated coconut oil is a type of coconut oil that has undergone a process called fractionation, which separates different components of the oil. This process removes the long-chain triglycerides, leaving behind only the medium-chain triglycerides (MCTs). As a result, fractionated coconut oil remains liquid at room temperature, unlike regular coconut oil, which is solid at cooler temperatures.
What if my lotion bars are too soft?
If your homemade lotion bars are too soft, you can melt them down and add more beeswax.
How To Make Lotion Bars
Ingredients:
- 1 cup solid coconut oil
- 1 cup cocoa butter
- 1 cup beeswax pellets (or grated beeswax)
- Optional: essential oils for fragrance (like lavender, peppermint, or vanilla)
-2 vitamin E capsules
Instructions:
1. In a double boiler or a heat-safe bowl placed over a pot of simmering water, melt the coconut oil, cocoa butter, and beeswax pellets together. Stir occasionally until fully melted and combined.
2. Once melted, remove the mixture from heat and let it cool for a few minutes.
3. If desired, add a few drops of your chosen essential oil(s) and vitamin E to the mixture and stir well.
4. Pour the mixture into silicone molds or any other mold of your choice.
5. Allow the bars to cool and harden at room temperature or place them in the refrigerator to speed up the process.
6. Once completely solid, remove the bars from the molds and store them in a cool dry place away from direct sunlight. I keep the lotion bar I'm currently using in a small container lined with parchment paper. The remaining bars are stored in the fridge in a separate container with parchment paper between each bar.
Before you know it, you'll be making lip balms, bath bombs, sugar scrubs, and my favorite muscle rub. At Lia Rose Simply Home we’ve got your self-care covered with a wide range of DIY self-care product recipes.

Subscribe to my email list and join me on this journey as we celebrate the joy of home, one delicious recipe and homemaking inspiration at a time.
Thank You for stopping by Lia Rose Simply Home, where you will find simple, inspirational, homemaking!


Comments