
DIY Textured Pumpkin
- Aug 29, 2022
- 3 min read
Remarkable Dollar Tree pumpkin makeover with craft paint and baking soda.
Fall is my favorite season to decorate for. The warm, earthy colors and everything nature gives us: Indian corn, corn stalks, mums, gourds, and best of all pumpkins. There are a lot of different store-bought pumpkins out there. Everything from metal to fabric and ceramic. If you are anything like me and have pumpkins everywhere, it can be costly. How about a DIY pumpkin that’s cheap to make, and looks amazing?

In today's post, I’m going to show you how to take a Dollar Store pumpkin and give it a remarkable makeover. This pumpkin craft will give the pumpkin a textured, ceramic look.
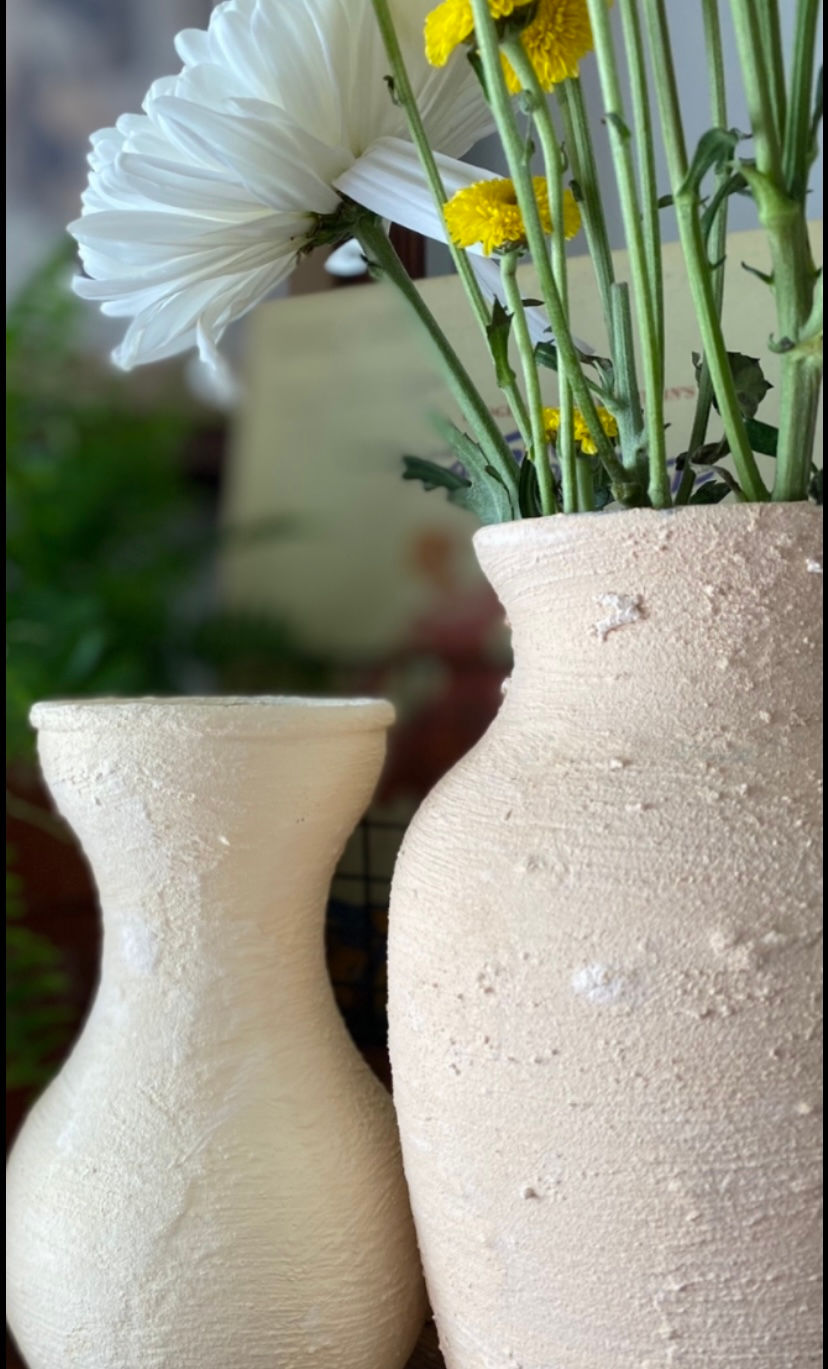
Not too long ago I shared a DIY- how to make a textured vase with craft paint and baking soda. I was so impressed with this technique I couldn’t wait to find something else to use this method on. I saw these pumpkins at Dollar Tree and knew right away what I was going to do with them.


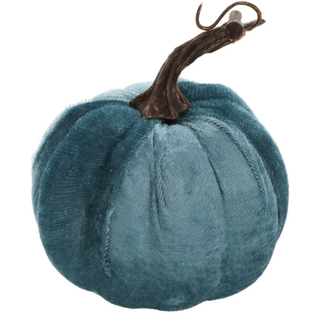


The first two photos above are the pumpkins from Dollar Tree, the orange pumpkin is the DIY textured pumpkin with craft paint and baking soda. The Dollar Tree pumpkin is styrofoam and covered with fabric. Cut the fabric off and pull the stem out. All you have to do is make one small cut at the top of the pumpkin, the fabric comes off easily.

If you can't find this exact pumpkin you can use just about any type of pumpkin as long as it's styrofoam, plastic, or glass. Dollar Tree has many pumpkins to choose from.
Walmart has craft paint for .46 cents a bottle, and they have two perfect colors for pumpkins, Jack- o- lantern and Pumpkin Orange. I used Jack- o- lantern for the pumpkins in these photos. Get creative and mix paint colors, if you want a lighter pumpkin mix beige or white craft paint with orange paint. You can even do an all-white pumpkin.
Materials for DIY textured paint
Craft Paint
Baking soda
This textured paint is so fun and gives amazing results. You can use this method on just about anything. This is a great way to give new life to an old piece. Check thrift stores, I purchased vases from a thrift store and applied the DIY textured paint. Look how beautiful they turned out and I only spent a few dollars. Keep in mind this textured paint is not waterproof.
Materials for DIY textured pumpkins
Craft Paint
Baking soda
Cinnamon stick for a stem (optional)
Paintbrush (I like the foam brushes from Dollar Tree)
Container to put the paint mixture in
How to makeover a Dollar Tree pumpkin
Prepare the pumpkin by removing the fabric and stem. You will be able to reuse the stem if you do not want to use a cinnamon stick. Place a pencil in the pumpkin where the stem was this will make it easy when you paint the pumpkin. See the video below.
Step one: Mix your paint and baking soda in a container. I used one bottle of craft paint and ¼ cup of baking soda. On the second pumpkin I added more baking soda the more baking soda you add the thicker the mixture will be, thicker mixture equals more texture. There is no right or wrong way to do this method.
Step two: Apply your first coat of paint mixture and let dry completely. It is important not to skip the drying step. The mixture will come off if it is not completely dry. The mixture will harden when it dries.
Step three: Apply a second coat. You can dry brush the second coat when it's partially dry if you want more specific lines. When the pumpkin is dry remove the pencil and insert the cinnamon stick for the stem. The simplicity and results of this project are pretty amazing. I hope you enjoy it.

Thank You For Stopping By Lia Rose Simply Home! Find me on Instagram, Facebook, and Pinterest.


Comments